
")
Have you ever pondered whether or not System32 and other Windows system folders are removable? I’ve always been interested in this topic and tried investigating it once. The results, however, were disastrous. You will experience system instability and will be unable to use your computer until you reinstall the operating system after tou delete system32 from it.
Reinstalling windows without first formatting the hard drive results in the creation of directories like “Windows.Old,” whose contents can be deleted along with system32 only if you know how to access them.
The system32 folder is present under the C:\Windows\. It has the necessary Windows executables and files needed to run Windows OS. The system will crash irretrievably if these files are removed or deleted.
Guide to Delete System32 Windows Folder and Its Files
It is not easy to delete system32 folder or its contents. Because the Trusted installer creates the folder “System32” and its contents as part of the Windows OS installation process, you should not leave any of your own files or folders in it.
Is It Okay to Remove the System32 Folder?
No! We won’t suggest erasing the folder or its contents, and you shouldn’t, either. The System32 folder and its files are essential to the functioning of Windows as an operating system.
Solution 1: Using DEL Command in the Command Prompt (CMD)

The DEL command in the Windows command prompt can be used to remove data from any directory. Let’s have a look at how to use the del command to remove files from the System32 folder.
• Open the Command PowerShell or prompt as admin whose shortcut is Win key+X, A.
• Type the following command:cd C:\Windows\System32 to change the working directory into the System32 folder.
• Then type in “del” followed by the filename, if you know the name of the file you want to remove/delete.
• Upon pressing enter , the file will simply get deleted from the folder.
Solution 2: TakeOwn (Take ownership command)
• First cd to the C:\Windows directory by using the cd command.cd C:\Windows
• Access ownership of folder system32 and all of its files/contents with the help of the takeown command.takeown /F System32 /R
• In the command mentioned above, the /F denotes that we are specifying the folder after that, and /R will simply apply the action to all of the files and subfolders. And if you are utilising this command on a single file, you don’t really have to specify /R.
• After that, press enter, and you should be able to have taken ownership of the system32 folder and files.
• Lastly, you can now just pass on the del command to the folder or file that you want to delete and then just delete it.del delete/deletefile.txt
• Other than that, you can remove the whole directory using :rmdir delete
Solution 3: Take Ownership from the Explorer Properties Tab

If you’d rather not use the command line, this same can be done using Windows’ File Explorer.
• By pressing the Windows key and E at the same time, open the File Explorer.
• Navigate to C:\Windows\
• Then right click on the System32 folder and press on Properties.
• Press on the Advanced, and then from the pop-up, press on the change.
• Then again, another pop-up will open where you’re supposed to type your account’s user name and then press enter.
• Then put a tick mark on “Replace owner on sub-containers and objects” hit Apply
• Lastly, close the all open properties tab.
Once you’ve finished the above steps, you’ll be the legal owner of the folder and its contents. Let’s go ahead and modify your account’s settings now.
Solution 4: Change Permission to Access Full Control for your Account

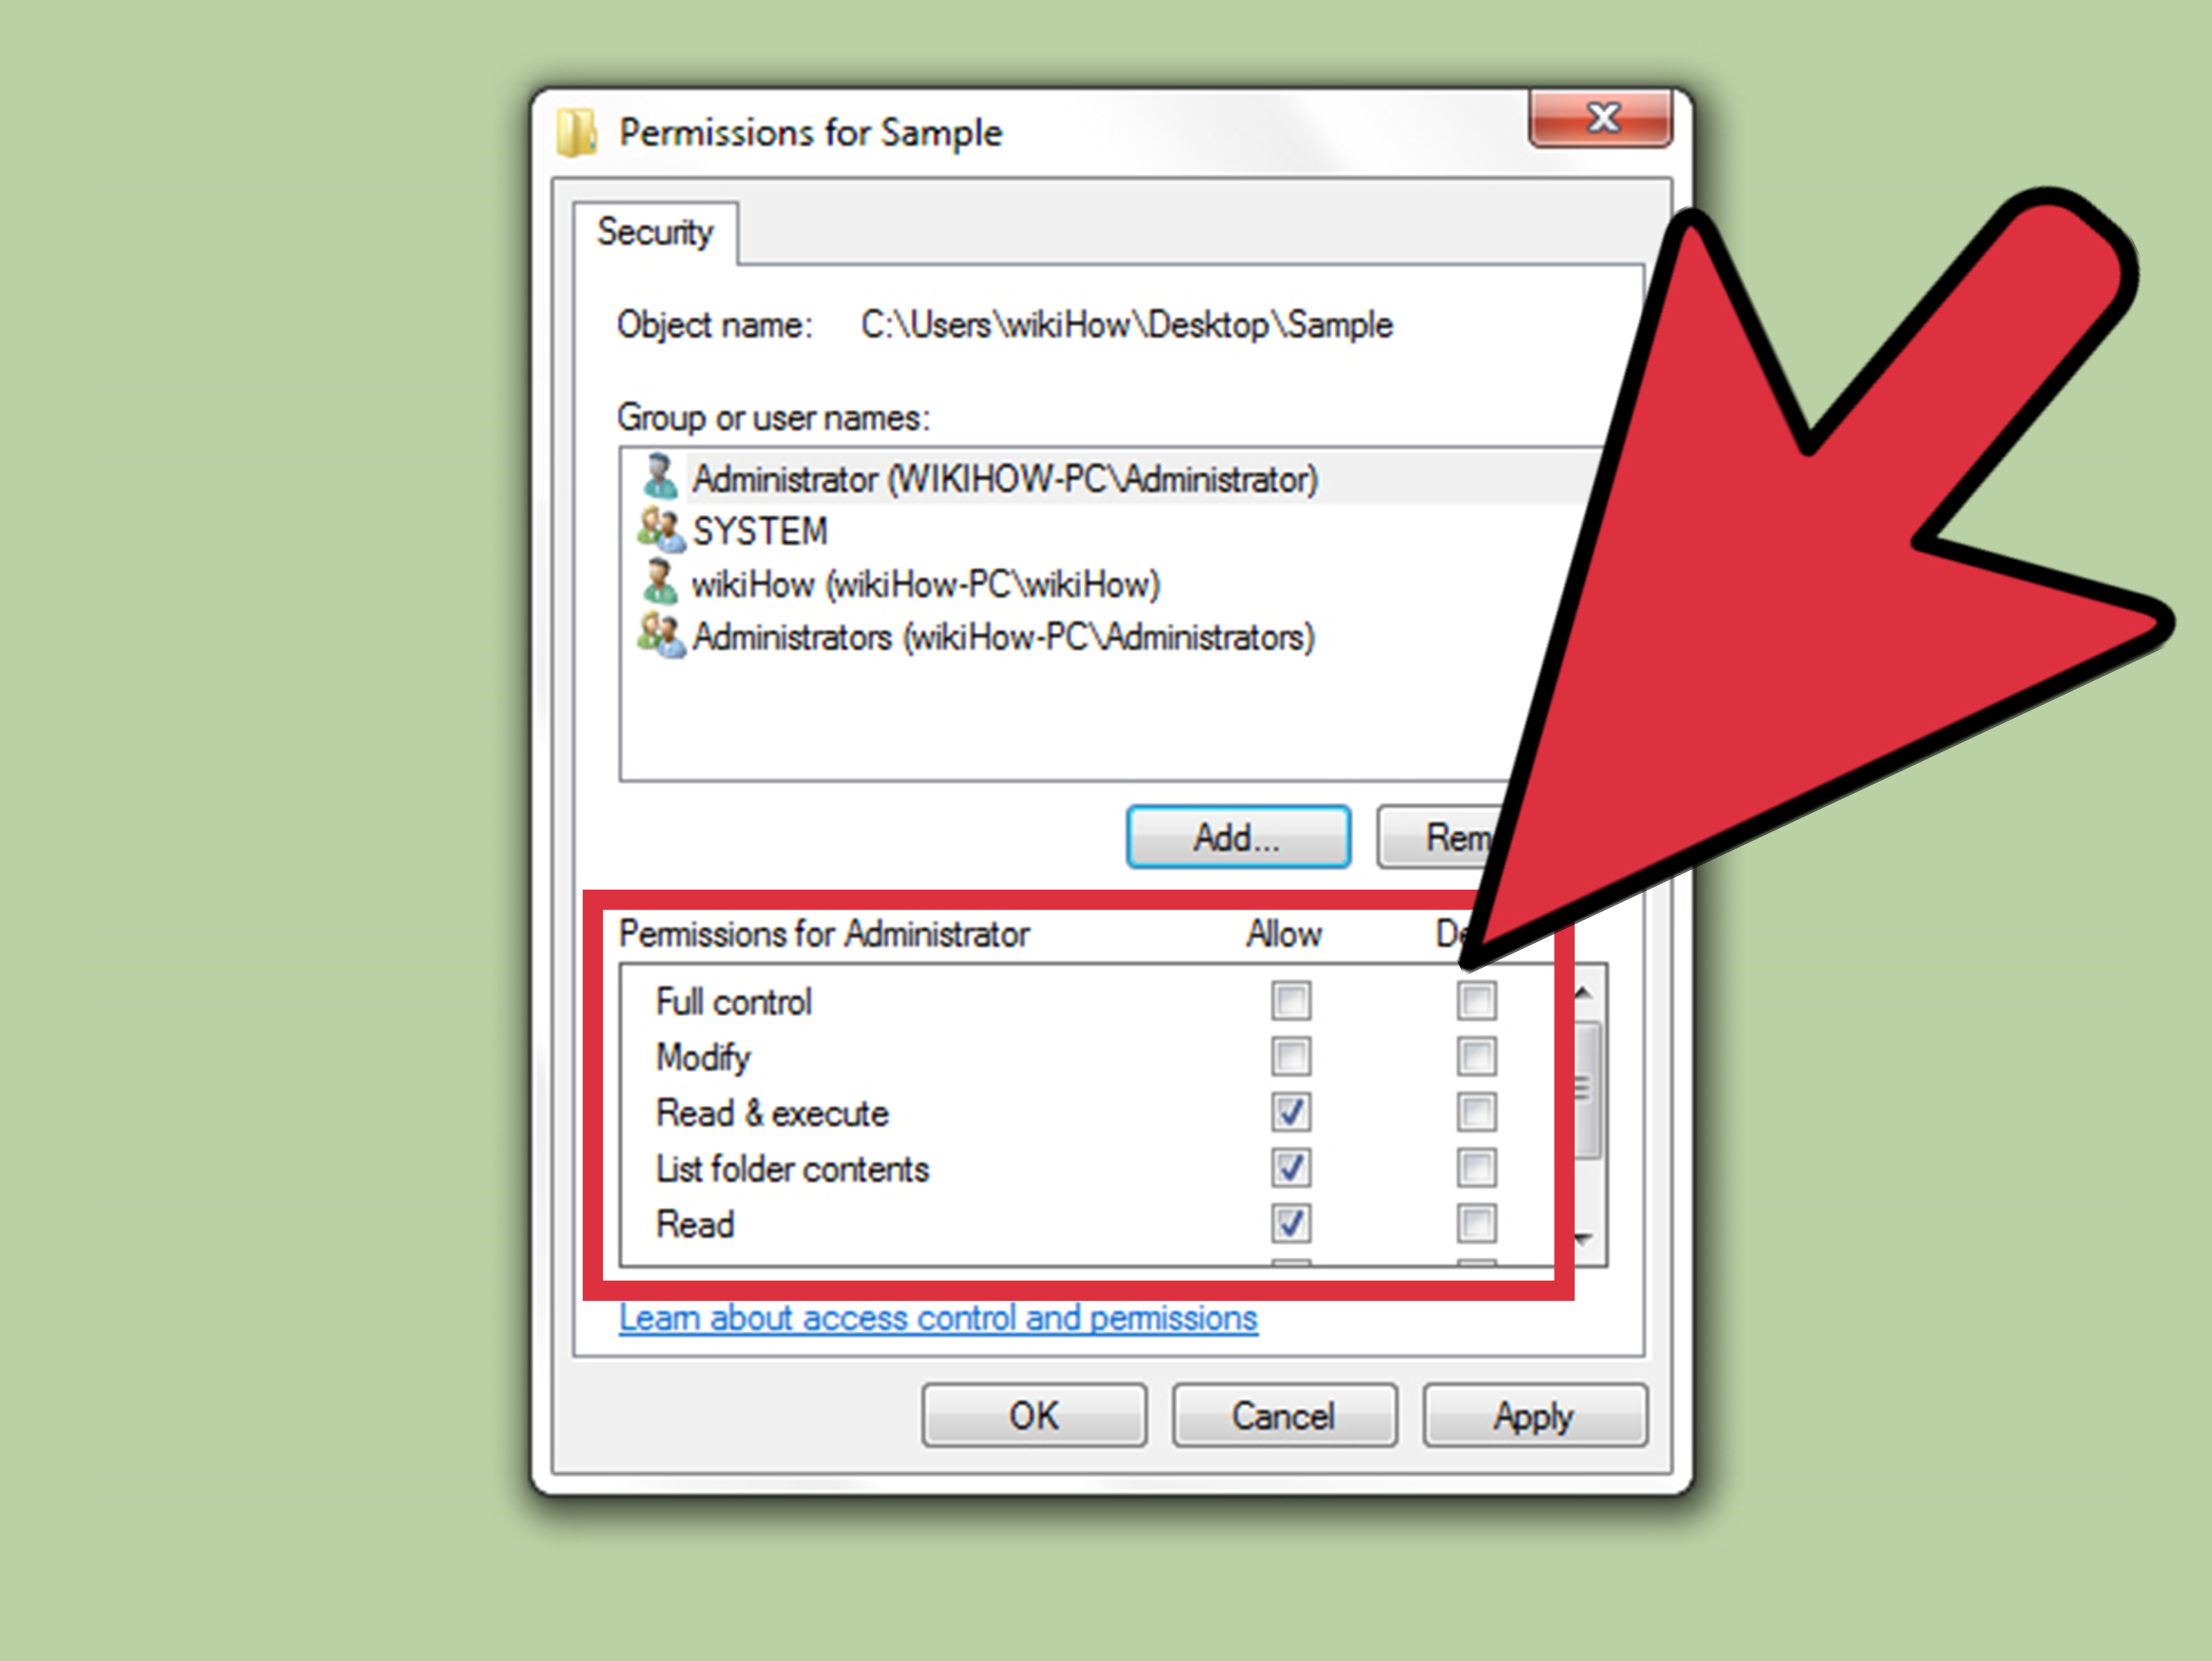
Following acquisition of title, you are now free to exercise full administrative authority over the data. Following these guidelines can help you accomplish your goal:
• To start, right-click on system32 folder and press on the Properties.
• Then press on the Security and then press on Edit to edit the properties.
• Then you’re supposed to press on Add and then just add your Username to list and press enter.
• Lastly, highlight your Username from list, press on Full Control, and then press Apply.
If you follow these instructions carefully, you should be able to fully manage the data on your computer. Right-clicking the folder now deletes it without asking you any questions or giving you an error message.
Editorial Remarks
To sum up, here is how to remove Windows’ System32 folder and its contents. As would be expected, the process is more involved than usual due to the difficulty of the work at hand. Do not delete the syswin32 folder unless you understand what you are doing and as well as its consequences.
")